
So to begin with, why encrypt?
To keep your data private in the event of other people obtaining access to your device. In some cases that is in your own interest (such as for personal devices not used for work) and in some cases the university wants you to!
And in the future, you may well find your access to university services becomes limited if you do not.
And it is so easy to do.
Encrypting iPhones and iPads
These instructions were prepared using an iPad, but they should apply well to an iPhone as well.
First of all, select the Settings app :-

One that is running, select “Touch ID and Passcode” which is found on the left-hand side :-
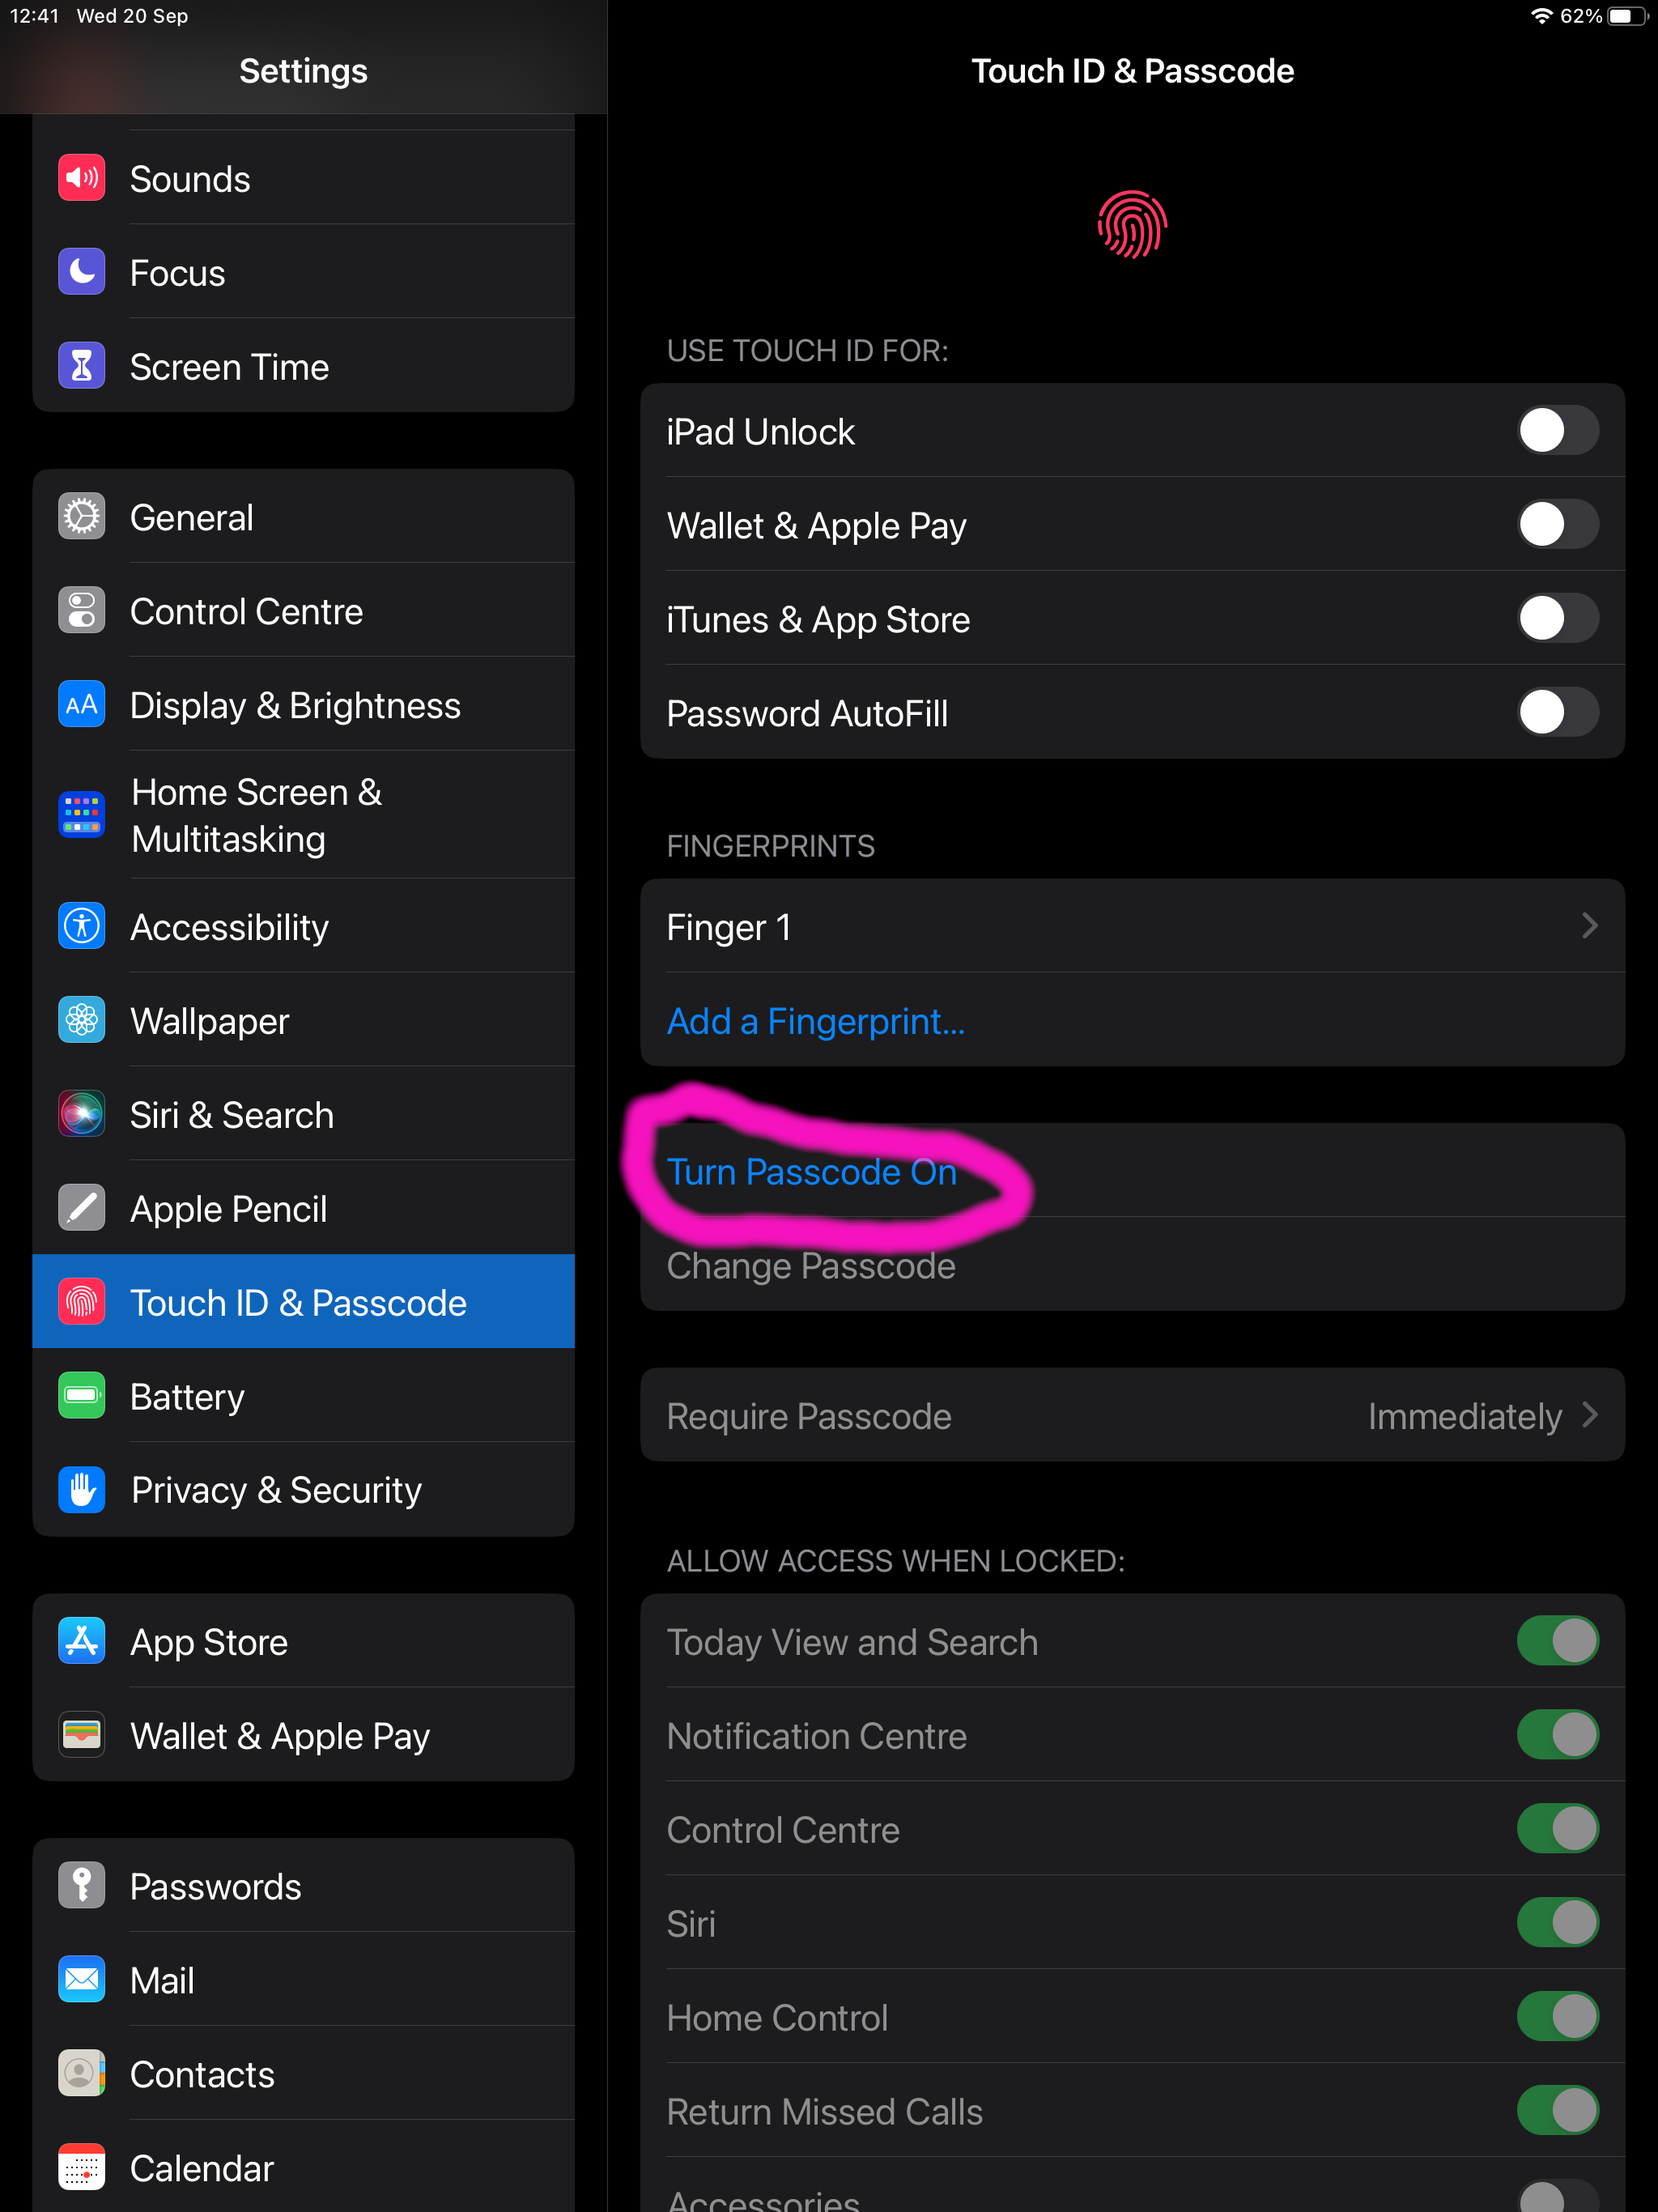
And then select “Turn Passcode On” (circled in some sort of pink-like colour).
This will take you through the process of setting a six-digit passcode (which you will have to enter twice), and just as a precaution it also requires you to login to iCloud.
Once it is set, that should be all that needs doing. Everything on your iThingie is now encrypted.
On macOS Laptops
Turning on encryption for a laptop with macOS running on it is only marginally more complicated. First of all, visit the Settings app (which has much the same cog-like icon as above), and select “Privacy and Security” down the left-hand side.
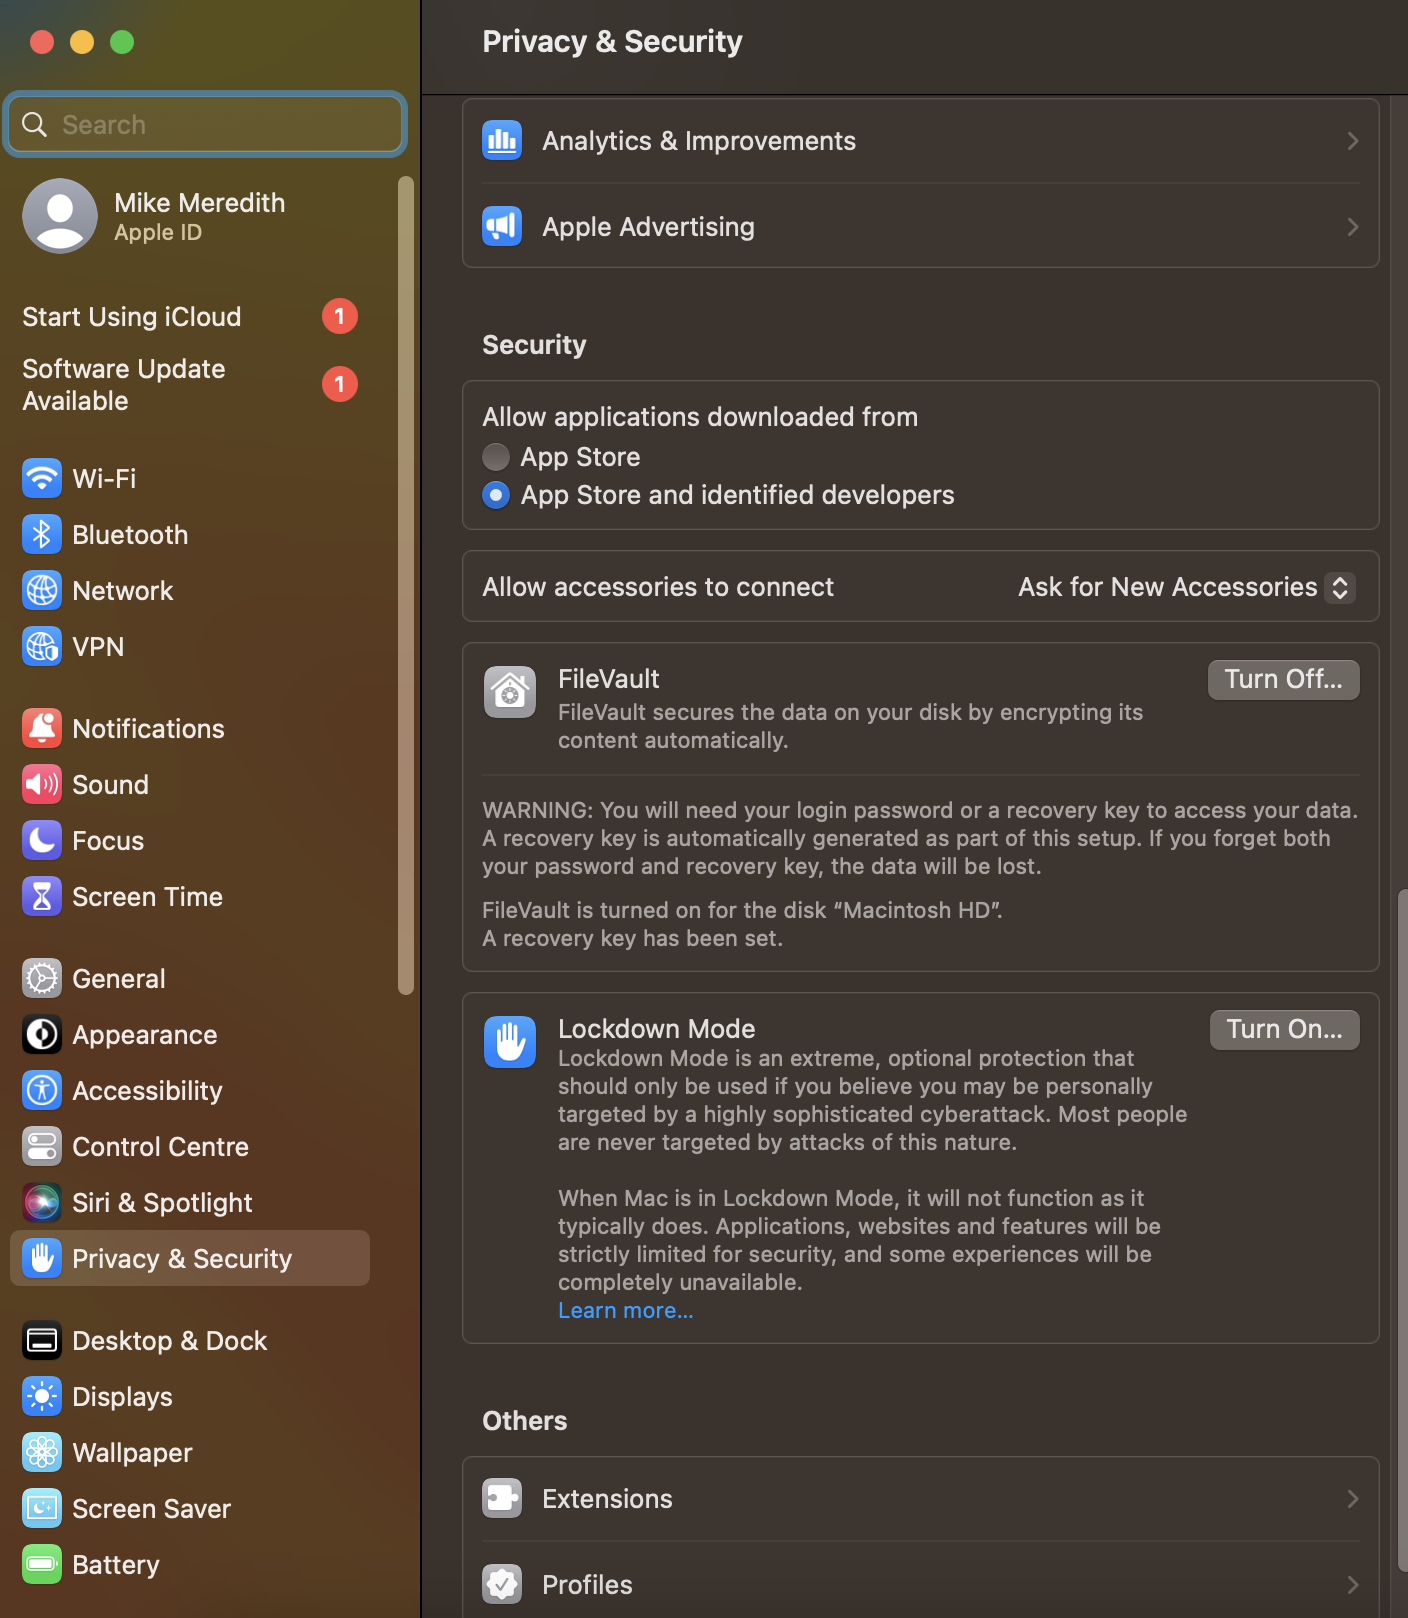
Once there, you may have to scroll down to see it, but the “FileVault” section is what you need. In my case, it is already turned on (and I’m not turning it off for this), but click on the “Turn On” button and it will take you through the process.
Oh! And if you have a red circled number next to your “Software Update Available” menu item, do an update too. I’m only waiting until the end of the working day before I kick mine off.